Showing posts with label design for quilts. Show all posts

Monday, 2 June 2014

Side-tracked

When I am working on plain white fabric as a background  one of my concerns is that it is - well just that - plain white. It doesn't have colour or the texture of dyed fabric to add interest. So I have been experimenting with adding texture, using scrunched up very find cotton.


It was also a lovely day, so I took the sewing machine into the garden.


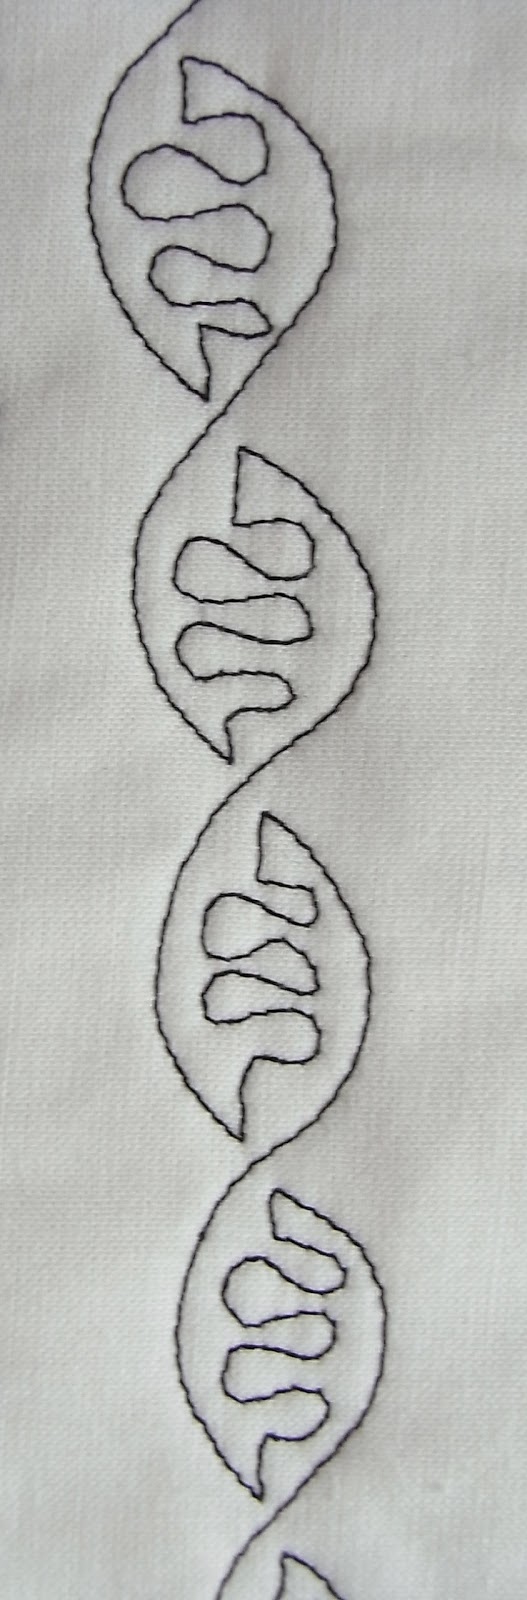
Here is a close up of the final effect. The cotton is rushed and then stuck down to a backing fabric. I tried using both bondaweb and temporary glue spray and both work well, but for this larger piece I used bondaweb. I did quite a few trials of patterns to see which worked. Some are too fine and just get lost in the folds, but line, particularly across the fold work well. For a background, I always like to mix and match the patterns a bit, so I've used 3 here. The quilting has to also be quilt large.


The patterns are more obvious from the back. I also had to quilt this from the back, to avoid getting the quilting foot caught up in the folds.


Here is back and front together to see the contrast. I really like this. From a distance what you get is a much stronger, more vibrant texture than quilting alone will provide. As you come closer, variations in pattern become clearer and draw you in.

I have in mind some pieced neutrals to applique onto this. I'm going to call it 'Sidetracked' because the piecing will look a bit like tracks - but also I am of course getting sidetracked from my show quilt for the Birmingham Festival of Quilts. Some ideas won't wait to come out!

And talking of show quilts, the two quilts I sent of to the Malvern Quilt Show have returned. As well as 'White on Black, Black on White' that I blogged about a couple of weeks ago, I had also entered 'Fracture' into the small wall hanging category

Malvern Quilt Show judges' merit 2014 quilted wall haning free motion quilting

There were no judges comments, but 'Fracture' came back with a 'judge's merit' rosette. I am really thrilled as I was afraid my ribbon for 'Square Spiral' might be a one off. So now I should get back to the FOQ quilt (to be named Cosmic Split) - or maybe I'll just get sidetracked again!!

Thanks for dropping by...

Hilary Florence


Please find below a list of linky parties. I may not link with all of the every week, but with some of them most weeks. Please go and have a look at some of the other wonderful quilts and quilters there.
Anything goes Mondays @ http://marelize-ries.blogspot.co.uk/
Linky Tuesday at Free motion by  the river­­­­ @ http://www.conniekresin.com/
Fabric Tuesday @http://quiltstory.blogspot.co.uk/    
Sew cute Tuesday @ http://www.blossomheartquilts.com/ 
WIP Wednesday at freshly pieced   @   http://www.freshlypieced.com/
WOW = WIPs on Wednesdays  @ http://www.estheraliu.blogspot.co.uk/  
WIP Wednesday at TN + TN  @ http://needleandthreadnetwork.blogspot.ca
I Quilt Thursdays @ http://prettybobbins.com/
Really Random Thursdays @ http://www.liveacolorfullife.net/
Needle and Thread Thursday @ http://myquiltinfatuation.blogspot.co.uk/
Off the wall Fridays @ http://ninamariesayre.blogspot.co.uk/
Friday linky party @ http://www.confessionsofafabricaddict.blogspot.co.uk/
Lizzie Lenard @http://lizzielenard-vintagesewing.blogspot.co.uk/2014/06/where-has-free-motion-friday-gone.html

Monday, 21 April 2014

All Aflame and Arrow Heads from Learning Curves in 9 Squares

After the excitement of last weeks guest post with Lori at The Inbox Jaunt thanks to all of you who visited the tutorial. I hope many of you found a new source of inspiration in Lori's wonderful FMQ and welcome to new visitors who through the tutorial discovered this blog. If you left a message and I did not reply, this is because you are a 'no-reply blogger' - a problem that often crops up if you are on Goggle plus.

Arrow Heads - from Learning Curves in 9 Squares


So after dramas with show quilts and missed deadlines, back to the Learning Curves in 9 Squares. Arrow Heads is the 5th of the squares you have seen so far. A single border of this pattern is very effective - almost more so I think than en- masse as here.  I like the look of it, but it is not one of my favourites to stitch. I keep forgetting whether I am turning left or right and it takes a lot of concentration. Remember this piece is a trial - hence the learning curves - and one of the lessons learnt here is that pale colours don't work. You may be able to see the FMQ on this somewhat wonky photo (sorry about that), but step a few feet away, and you can't see anything.


All Aflame from Learning Curves in 9 Squares

There is no such problems with this square. The deep red shows up beautifully. The name I think is pretty obvious. This is a design that is very adaptable and works very well around corners


Cobbler's Nightmare from Learning Curves in 9 Squares

I asked your help in naming two of my motives - many thanks to all those who left suggestions. It was fascinating to see what was evoked in viewers. I did like the suggestion of DNA for the above one, but also a few visitors liked the humour of my suggestion of 'Cobbler's Nightmare' and since it appears the joke is obvious enough, I will go with that. The pale green by the way, poses the same problem as the yellow.

Fly-away-home from Learning Curves in 9 Squares

This was the one that really got your creative juices flowing. There was no doubt at all that all of you thought organic both vegetable and animal. There were flowers, hay and vines as well as hearts, lungs and back-bones! My thanks to you all, but particularly to Norma Schlager who came up with the nursery rhyme 'Ladybug, Ladybug, fly away home' as a title, which I really loved.

Now I can hear all my British visitors shouting 'but it isn't Ladybug, it's Ladybird'. A bit of Internet research has shown the common British Ladybird is indeed the same insect known as Ladybug in the States - a beetle loved for its appearance and eating of pests such as greenfly. And that got me wondering where the rhyme originated.

 'Ladybird, Ladybird, fly away home. Your house is on fire and your children have flown'

It is thought to have dated back to 18th century (I mean 16th century - see Marly's kind correction below) England and the time of Henry VIII's break with Catholicism. The Lady in question is Mary, mother of Jesus as representative of the Catholic faith and a suggestion to return home to Rome. 'Your house is on fire' is probably a reference to those burnt at the stake for refusing to convert to the new Church of England. 'Your children have flown' refers to Catholic congregations - who had flown into hiding, exile or converted. Fascinating where a piece of FMQ can take you!
To avoid the bird/bug confusion - and because although the motif does look like some kind of flying insect, it definitely isn't a ladybird, I thought I'd just call it 'Fly away home'.

Thanks for dropping by...

Hilary Florence


And for all those of you who missed it, here is the tutorial that appeared as a guest post on Lori's blog last week


Hello Quilters. I am Hilary Florence and I am really thrilled and excited that Lori has agreed to let me do a guest post on her blog. Although our quilting styles are very different, like Lori, I love to create new free motion quilting patterns. So, what better topic than how to start with a simple idea and by playing here and tweaking there, changing it to create:

Theme and Variation

I am going to start with a very simple, elegant design which lets you get into a lovely rhythm on a swinging cross over curve.


Start with a simple downward curve out to the left.


 Stitch up  the middle stopping just short of the starting point


 Now do a mirror image of the curve - out to the right this time, cross over and do another curve to the left - making and inverted S shape.

Go straight up the center, stopping short of the cross over line. You are now ready to begin the motif again with your inverted S - and that's it. Keep going as long as you want.


So - that's the theme, on to the variations

If you have a curve, alter the depth of it.


My first curve was pretty shallow. Here I have made it much deeper, into semi - circles. You can do anything in between or even push it even further and make the motif wider than it is long.

If you have a curve, turn it into a V


Instead of soft curves you now have sharp angles, giving the motif quite a different character. The central line is now enclosed in a box. Think of going across from right to left at 45 degrees, making the exterior angles 90 degrees.

 If you have sharp angles, round them.


The change here is more subtle. Still Vs rather than curves, but this has a softer look.

If you have straight lines, put a kink in them.


This again is not a great change but it gives another feel. Each side of the box should kink slightly towards the centre. Put the kink in the outer lines only, not the central line. The cross right to left cross-over line is now a little more complicated as it has to first kink upwards towards the upper box and then downwards towards the lower box.

Now come the real fun!

If you have a central line, embellish it!


Anything goes here and there are lots of possibilities. Here are just some examples.
I've taken the semi-circle version, started my upward line and then inserted a (more-or-less) symmetrical meander. You could also think of this as a very squashed S.


Next I've gone back to my original flat-curve shape and filled it almost meanders. Just enter and exit with a short bit of straight line. This is one of my favourites and it usually finds a place somewhere in my quilts


The sharp cornered square version deserves a couple of sharp thorns.


And here is the same motif with all the corners smoothed out!


This 'squiggle' also makes a good centre line. Start curving upwards to the left, change direction and curve gently upwards, change direction again and curve upwards to reach the top of the inverted 'S'. 

If you have a nearly close point, open it up.


In all the samples up until now, the middle line has nearly but not quite met the upper line giving the illusion of a square or circle. Now, I have only gone about two thirds of the way up (with the embellishing circle placed about one third of the way up)and dropped the next cross-over line opening the motive up more.


And finally, if you have been there, done that, go back and do it all again!


This one is taken from the current piece I am working on, hence the enclosing 'tram lines'. It is a combination of two of the above variations. Firstly, I have done the rounded square version without central embellishment. I have then gone back stitching over with the circular version and the central squiggle - and I do mean gone back. Of course you could start at the top again, but I suppose I am too lazy to deal with all the threads involved in stopping and starting. When ever possible, I will stitch down a row and then back up. This is also excellent practise for when dealing with items that are too bulky to turn round.

So there we are - from one idea to many versions. All of the above samples are about 1 inch wide with the exception of the last which is one and a half inches. One inch is a good width to start with, but you can also vary the density by varying the size.

Finally, a word about marking. I often say that I mark as little as possible and advocate learning to love your wobbles! I am in awe of the skill of FMQ quilters who produce absolutely identical motifs, but I like the organic look of everything a bit wonky and each repeated motif having its own individuality. I admit to being anxious about this when I considered Lori's wonderful tidy accurate quilting and wondered if I should make an exception. In the end, I decided to be true to my philosophy and stay a bit messy! To start off with I advise marking guide lines 1 inch apart until you can feel the motif. You can chose whether to be neat and tidy and do this with a ruler, or free and easy and mark the lines free hand!  I would be interested to hear where you find easier/better for you. I personally also feel it helps to draw the motif first, or at least to trace it with your finger.

It remains to thank Lori for allowing me to do a guest spot on her blog. I feel very honoured. At the time of writing this, she has just revealed that she has been asked to do a bimonthly column for the  American Quilter  magazine and I want to add my voice to the congratulations. It is richly deserved.

If you would like to see more of my work and fmq designs, please visit my blog at http://quiltingworkshop.blogspot.co.uk/  

Thanks for reading

Hilary Florence

Please find below a list of linky parties. I may not link with all of the every week, but with some of them most weeks. Please go and have a look at some of the other wonderful quilts and quilters there.
Anything goes Mondays @ http://marelize-ries.blogspot.co.uk/
Linky Tuesday at Free motion by  the river­­­­ @ http://www.conniekresin.com/
Fabric Tuesday @http://quiltstory.blogspot.co.uk/    
Sew cute Tuesday @ http://www.blossomheartquilts.com/ 
Show and tell Tuesday @ http://ihavetosay.typepad.com/randi/
WIP Wednesday at freshly pieced   @   http://www.freshlypieced.com/
WOW = WIPs on Wednesdays  @ http://www.estheraliu.blogspot.co.uk/  
WIP Wednesday at TN + TN  @ http://needleandthreadnetwork.blogspot.ca
I Quilt Thursdays @ http://prettybobbins.com/
Really Random Thursdays @ http://www.liveacolorfullife.net/
Needle and Thread Thursday @ http://myquiltinfatuation.blogspot.co.uk/
Off the wall Fridays @ http://ninamariesayre.blogspot.co.uk/

Monday, 24 March 2014

More learning curves...

This is another test piece for a larger work that I have in mind for a quilt show later this year. This is one of 9 squares (although the final version might have more).


This is a motif called 'hour glass'. Each square will be done in a different colour, using a different motif. At the end, there is, I hope, a bit of a surprise which I won't tell you now, because I want to know if you can see it. I've dyed material in the same colour as the thread to frame each square. I've been working in black and white for a bit. It is stunning, but I do miss colour! There is no doubt quilting on white makes the quilting really stand out, so this is a bit of a compromise.

In the recent black and white pieces, I've quilted the motifs in 'straight' rows. I say straight, because I don't mark them and they certainly wouldn't match up with any ruler! Here, I do mark the curves. I tend to stitch the parallel-lined curves first, then fill them in with the motif. I don't try and keep the 'parallel' line perfectly parallel. In fact, I often deliberately try to vary them a bit, opening up at the apex of a curve. Distorting the pattern to fit the resulting shapes is perhaps my favourite part of quilting.

Thanks for dropping by...

Hilary Florence

Please find below a list of linky parties. I may not link with all of the every week, but with some of them most weeks. Please go and have a look at some of the other wonderful quilts and quilters there.
Anything goes Mondays @ http://marelize-ries.blogspot.co.uk/
Linky Tuesday at Free motion by  the river­­­­ @ http://www.conniekresin.com/
Fabric Tuesday @http://quiltstory.blogspot.co.uk/    
Sew cute Tuesday @ http://www.blossomheartquilts.com/ 
Show and tell Tuesday @ http://ihavetosay.typepad.com/randi/
WIP Wednesday at freshly pieced   @   http://www.freshlypieced.com/
WOW = WIPs on Wednesdays  @ http://www.estheraliu.blogspot.co.uk/  
WIP Wednesday at TN + TN  @ http://needleandthreadnetwork.blogspot.ca
We did it Wednesday @ http://www.sewmuchado.com/
I Quilt Thursdays @ http://prettybobbins.com/
Really Random Thursdays @ http://www.liveacolorfullife.net/
Needle and Thread Thursday @ http://myquiltinfatuation.blogspot.co.uk/
Off the wall Fridays @ http://ninamariesayre.blogspot.co.uk/


Monday, 24 February 2014

To cut or not to cut?

 Actually, that isn't  the question. The black on white quilted piece shown in progress last week, is now finished. The question is, how do I cut it up?


I admit, I am very nervous now. If I get this wrong, a lot of work will to to waste, so for the moment I am still working with my paper layouts. Here are some more.

The shapes are quite nice, but the layout gives a very boring negative space...


so a couple of different arrangements...


a few more with a kind of 'zipper' effect, playing around with the amount of separation between the right and left sides...


or in alignment...like this one, interesting negatives spaces...


could this be the one???

thanks for dropping by...

Hilary Florence

P.S. I am linking this to:
Linky Tuesday at Free motion by  the river­­­­ @ http://www.conniekresin.com/  
Fabric Tuesday @ http://quiltstory.blogspot.co.uk/    
Sew cute Tuesday @ http://www.blossomheartquilts.com/ 
Show and tell Tuesday @ http://ihavetosay.typepad.com/randi/
Let’s Bee Social @ http://sewfreshquilts.blogspot.co.uk
WIP Wednesday at freshly pieced   @   http://www.freshlypieced.com/
WOW = WIPs on Wednesdays  @ http://www.estheraliu.blogspot.co.uk/  
WIP Wednesday at TN + TN  @ http://needleandthreadnetwork.blogspot.ca
We did it Wednesday @ http://www.sewmuchado.com/
Friday linky party @ http://www.confessionsofafabricaddict.blogspot.co.uk/
Do go and have a look at some of the other fantastic quilts and quilters there.

Friday, 21 February 2014

Black and white layouts - playing around


I showed this piece in a post last week and said when it was finished (there is about twice as much still to quilt) I would cut it up and applique it.  I have some hand-dyed charcoal material for the background which I will quilt in black - probably in pebble or some other overall pattern.Quite a few visitors were very curious to see how I chop it up. Well, so am I!!

I got out some black and white paper and started playing with layouts. For the next few posts I'll show you some of the ideas I have come up with - although I haven't yet decided which - if any - of them I will use. Today's layout is mostly squares, starting with just a few...


These just landed on the paper like that as I was cutting... so I added a frame...


but it is very basic, so I added more squares...


again framed, playing with strips of different thickness...


felt it still needed more squares...


more or less happy with those square, so now trying out different frames. Elements to play with are thickness of strips, weight given on each side by thickness/number of strips and the negative space between strips.


I'm not quite sure about the thick strip on the base...


and then if you turn it on it's side the whole thing looks different again...


These are just ideas. What is black might become white and vice-verse. The only reason it is this why around is because I have bigger sheets of white paper than black!

Thanks for dropping by...

Hilary Florence

P.S. I have linked this post to:
Off the wall Fridays at http://ninamariesayre.blogspot.co.uk/#
Show off Saturdays at www.sewcanshe.com
 Do go and have a look at the other quilts and quilters there.


Tuesday, 14 January 2014

More Design Workouts

Here is the next batch of my Design workouts. I've chosen a different colour scheme, but still kept the colours close to each other.


You can see quite clearly that there is a lot of text. As much as text is popular in collage work at the moment, this is not a great design element. I am simply using up a load of photocopies, which I have given thin layer of cheap acrylic paint using a gelli plate. 


I haven't added any texture, or done any fancy printing. The name of the game here is quantity - cheap and cheerful, done quickly without much thought - but above all done!


Enjoy

Thanks for dropping by...

Hilary Florence